

Introduction
In this guide you will learn how to import and map a multi-row on a screen with the Screen Mapping Wizard.
This guide will take you through the process of using the screen mapping wizard to map a multi-row on a screen including multi-rows which allow ‘drill-down’ to other screens.
Guide
This guide assumes that you have already imported a recording of the screen, recognized it in Studio, started the Screen Mapping Wizard and moved to the Identify Type of Screen step.
Identify Type of Screen
1. In this step choose Multi-Row Screen:

2. Click Next to move on to the next step of the wizard.
Select Screen Navigation Behaviour
1. The next screen allows you to select the navigation behaviour for the screen:
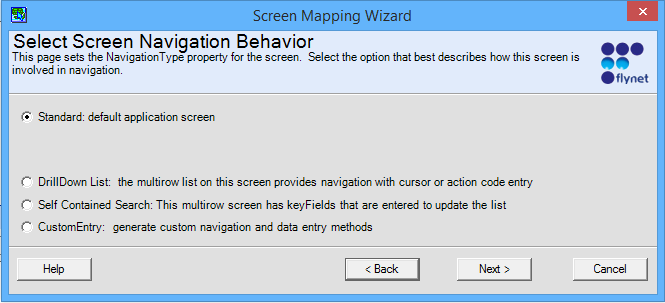
2. Select Standard if the multi-row does not have drill-down functionality.
3. Select DrillDown List if the screen does have drill-down functionality.
4. Click Next to move on to the next step of the Wizard.
Define New Screen Title Labels
1. The next screen allows you to define the area of the screen that contains its title labels.
2. Define the Title Labels area as described in Guide to Recognizing Normal Screens
3. Click Next to move on to the next step of the wizard.
Define New Screen Detail Labels and Data
1. The next screen allows you to define areas of the screen which contain detail labels and data that are not part of the multi-row.
2. Define any such areas as described in Guide to Recognizing Normal Screens.
3. Once you have defined the areas or if there are no such areas, click Next to move to the next step of the wizard.
Map Multirow Data Area
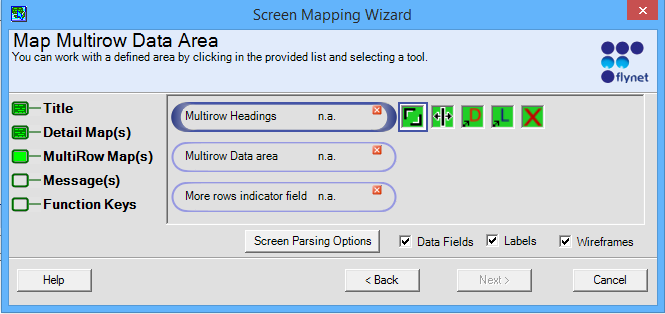
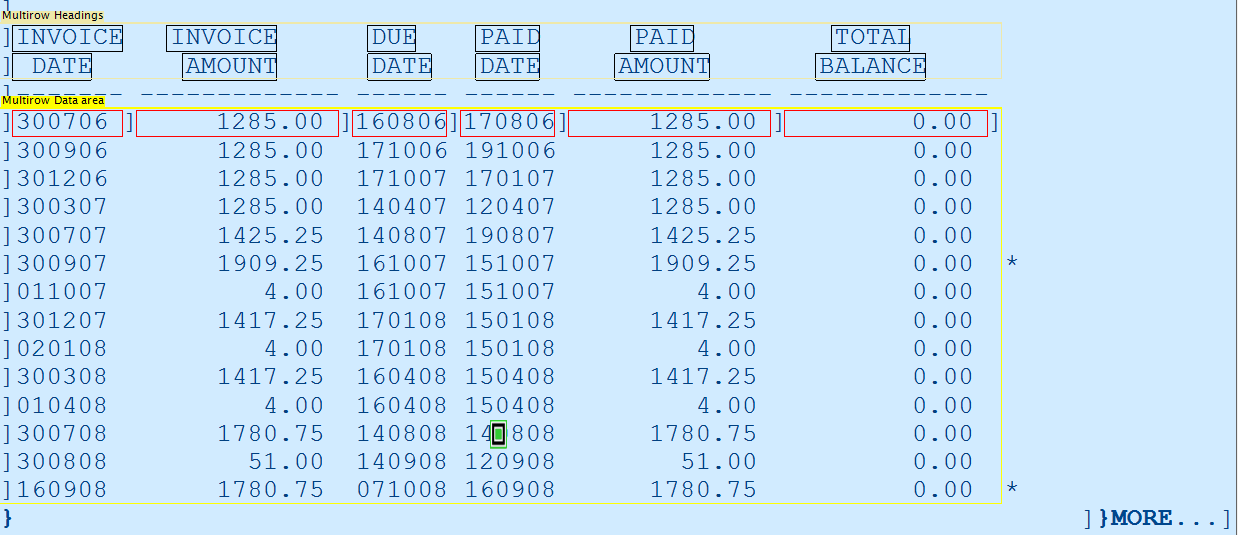
1. The next screen allows you to define the areas which make up the multi-row:
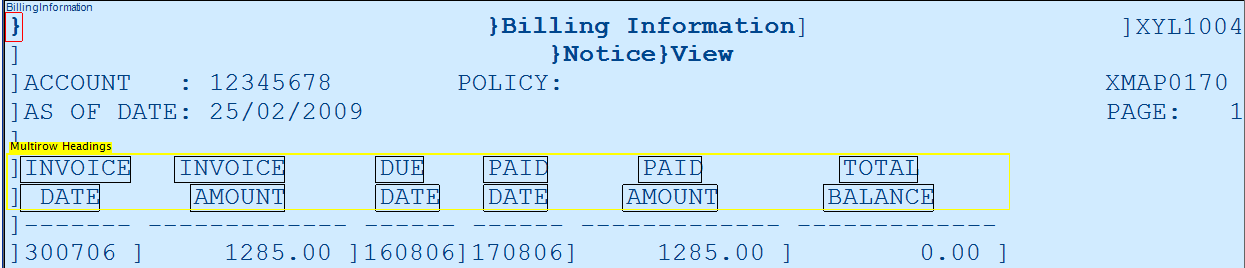
2. Starting with the headings of the multi-row, left-click and drag the mouse to define the area which contains the headings:
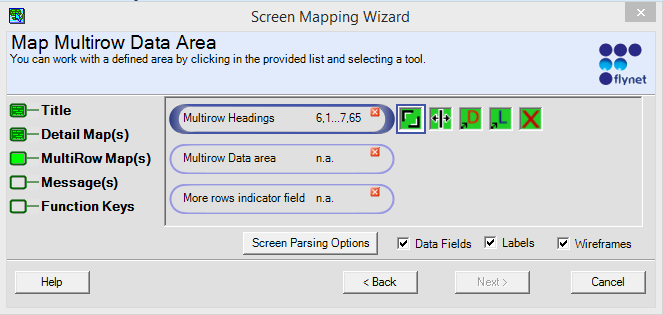
3. Once the headings are is defined, click Multirow Data area to begin defining the data area of the multi-row.
4. Again, left-click and drag the mouse to define the data area.
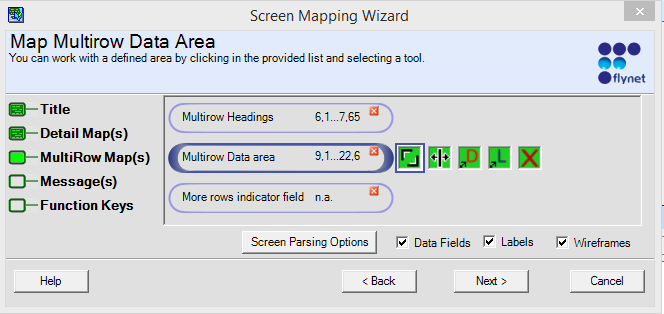
5. Be sure to include all of the rows of the multi-row in the area.
6. Once the data area has been defined, click More rows indicator field to begin defining the more rows indicator area of the multi-row.
7. Again, left-click, drag to define the more rows indicator:

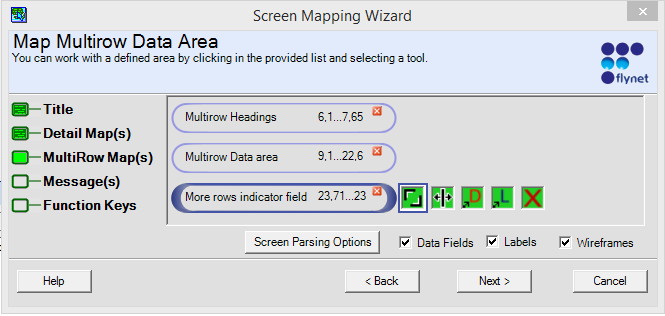
8. Once you have defined the more rows indicator, click Next to move to the next step of the wizard.
Field Names and Uses
1. The next step in the wizard allows you review the labels and fields identified by the wizard:
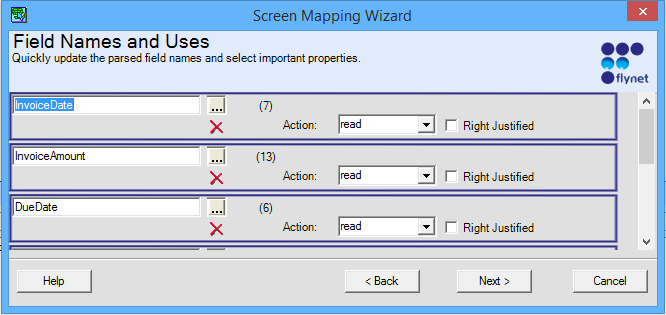
2. For multi-rows, this will include the fields of the multi-row and the more rows indicator.
3. Once you have reviewed the fields identified by the wizard, click Next to move to the next step.
Define New Message Display Fields
1. The next screen allows you to define the area of the screen which contains messages from the host.
2. Define any such areas as described in Guide to Recognizing Normal Screens.
3. Once you have defined the area or if there is no message area, click Next to move to the next step of the wizard.
Define New Screen Function Key Descriptions
1. The next screen allows you to define the area of the screen where function keys and their labels are displayed.
2. Define the area as described in Guide to Recognizing Normal Screens.
3. Once you have defined the areas or if there are no function keys, click next to move to the next step of the wizard.
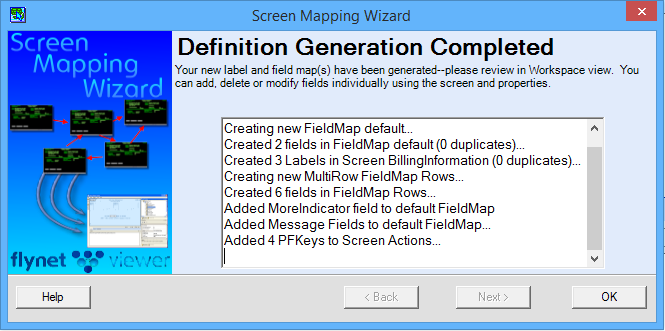
Definition Generation Completed
1. The final step of the wizard is the creation of the field map, including a map named Rows for the multi-row:
2. There will be a pop-up asking if the physical function keys should work with the screen as well:
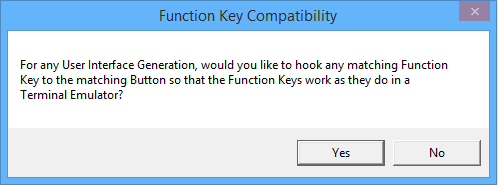
Select Yes if you want the physical function keys on the keyboard to work along with the on-screen buttons.
3. If there are fields on the screen with names that match those of fields on other screens in the project, then you will see the Field length check pop-up for each matching field:
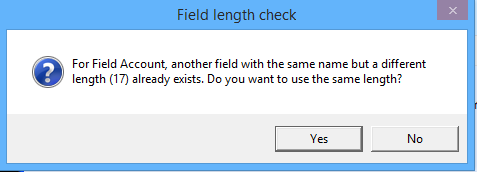
Select Yes if you want the field length to match, select No if you want the field lengths to remain different.
4. Click OK to close the wizard.
Reviewing the Generated Field Maps
1. The generated multi-row map can be reviewed and edited by expanding the Rows map under the screen in the Project Explorer:
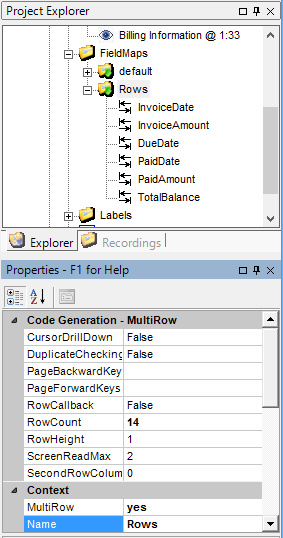
2. The properties of the multi-row can be reviewed and edited by selecting the Rows node in the tree and using the property grid.
3. The properties for the individual fields can be reviewed and edited by selecting the field in the tree and using the properties grid.
4. Help on specific properties can be accessed by selecting the property in the grid and pressing F1 to access the context sensitive help.